电脑型号:MacBook Air (M1, 2020)
系统版本:macOS Sonoma 14.0
参考 https://zhuanlan.zhihu.com/p/464386728
使用链接中的2源码编译安装,其百度网盘文件编译没有产生问题
QEMU emulator version 8.1.2
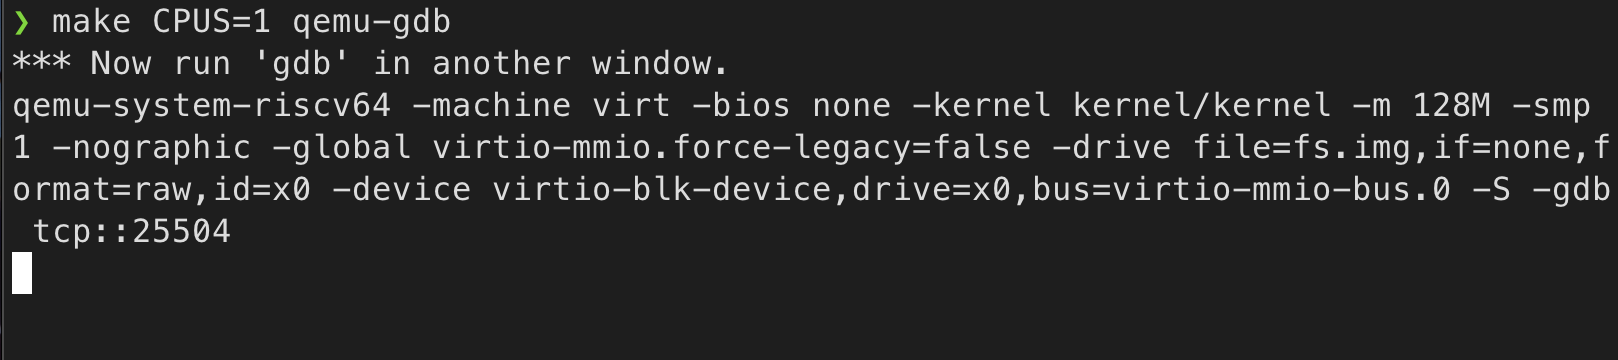
在xv6目录下使用make CPUS=1 qemu-gdb,记住最后的端口号
mac下查看隐藏文件快捷键cmd+shift+.
在主目录~下创建一个.gdbinit,从而使得gdb启动时能够读取xv6目录下的.gdbinit
初始化gdb,从而无需在每次打开gdb时重复配置
1
| add-auto-load-safe-path {YourPath}/xv6-riscv/.gdbinit
|
在xv6目录下的.vscode文件夹中创建两个文件,tasks是复数
launch.json
 1
 2
 3
 4
 5
 6
 7
 8
 9
10
11
12
13
14
15
16
17
18
19
20
21
22
23
24
25
26
27
| {
// Use IntelliSense to learn about possible attributes.
// Hover to view descriptions of existing attributes.
// For more information, visit: https://go.microsoft.com/fwlink/?linkid=830387
"version": "0.2.0",
"configurations": [
{
"name": "Debug",
"type": "cppdbg",
"request": "launch",
"program": "${workspaceFolder}/kernel/kernel",
"cwd": "${workspaceFolder}",
"miDebuggerPath": "/opt/riscv-gnu-toolchain/bin/riscv64-unknown-elf-gdb", // 可能需要更改
"miDebuggerServerAddress": "127.0.0.1:YourPort", // 修改端口
"MIMode": "gdb",
"stopAtEntry": true,
"preLaunchTask": "fix_gdbinit",
"setupCommands": [
{
"description": "Enable pretty-printing for gdb",
"text": "-enable-pretty-printing",
"ignoreFailures": false
}
]
}
]
}
|
tasks.json
 1
 2
 3
 4
 5
 6
 7
 8
 9
10
| {
"version": "2.0.0",
"tasks": [
{
"label": "fix_gdbinit",
"type": "shell",
"command": "sed -i '' -e '/^target remote/d' ${workspaceFolder}/.gdbinit"
}
]
}
|
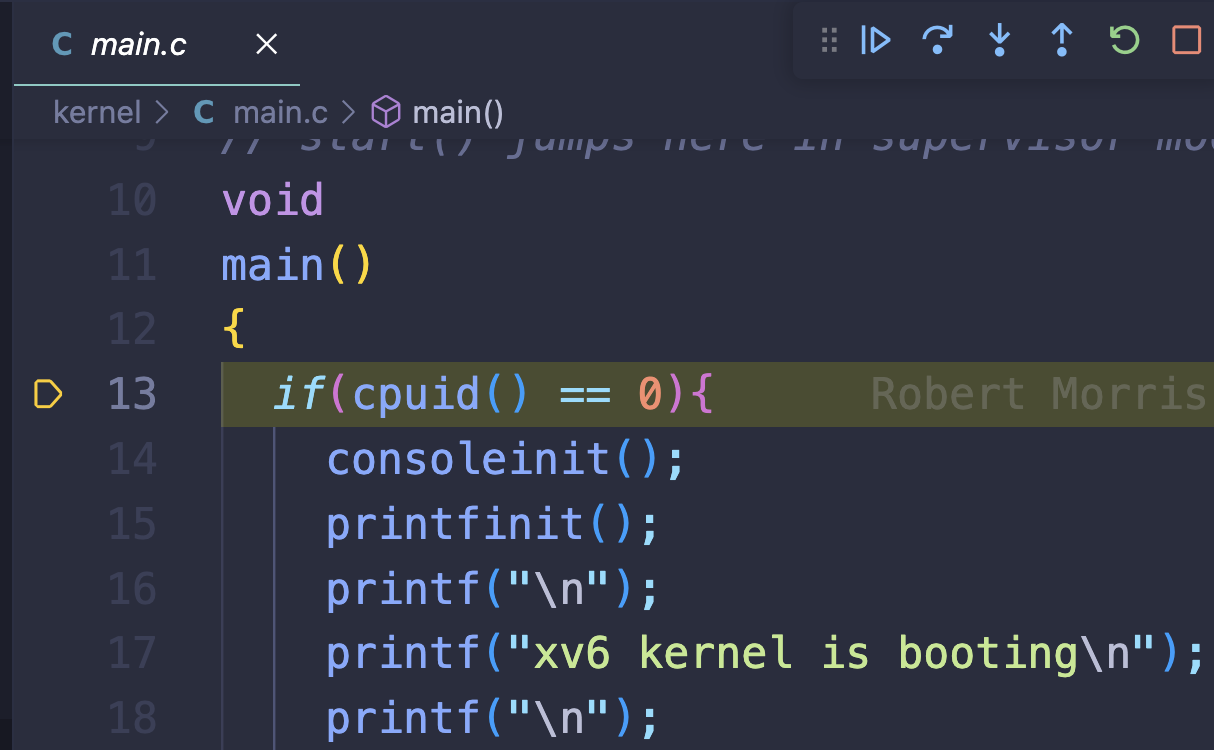
之后启动vscode的debug,如果一切正常,如下图所示。就可以欢乐调试了。
推荐绿老师的介绍视频 https://www.bilibili.com/video/BV1DY4y1a7YD
踩坑点:make qemu之后,按下ctrl+a后松开,然后按下
在qemu控制台中,可以通过info mem、info registers等指令查看模拟硬件的内容
再次按下ctrl+a后松开,然后按下c就可以退出qemu控制台